

Essential Mountain Bike Trail Tools 2026
Table of Contents
- Why Essential Mountain Bike Trail Tools Matter
- Multi-Tool Basics: The Core of Your Mountain Bike Repair Kit
- Choosing the Right Mountain Bike Multitool for Your Needs
- Tubeless Tire Repair Kit for Mountain Bikes: Essential Components
- Storage and Portability: Carrying Your Gear Trailside
- Mountain Bike Tool Kit Checklist: What You Actually Need
- Common Mistakes When Building Your Trail Kit
- Frequently Asked Questions
Last Updated: October 11, 2026
Why Essential Mountain Bike Trail Tools Matter
When your derailleur bends on a rocky descent or your chain snaps three miles from the trailhead, the difference between a ruined ride and a quick fix comes down to one thing: what you're carrying. Essential mountain bike trail tools aren't optional, they're the difference between walking your bike out and riding home.
Most riders carry too much or too little.
The real challenge is finding the right combination that solves 95% of mechanical failures you'll actually encounter without unnecessary weight.
Multi-Tool Basics: The Core of Your Mountain Bike Repair Kit
A multi-tool is non-negotiable for trailside work. Most riders choose between an 11-in-1 (minimalist) and a 17-in-1 (more capability), depending on bike setup and mechanical confidence.
11-in-1 vs. 17-in-1: Finding Your Sweet Spot
An 11-in-1 multi-tool includes hex keys (2mm-8mm), screwdrivers, chain breaker, tire lever, and Torx bit, covering brake adjustments, dropped chains, and puncture repair.
The Makalu 11 in 1 Bicycle Pocket Multi Tool at $14.99 fits in a seat pack and covers standard fasteners and basic adjustments.

The Makalu 17 in 1 Bicycle Pocket Multi Tool at $19.99 adds wrenches and sockets for non-standard bolt sizes and derailleur adjustments.

Choosing the Right Mountain Bike Multitool for Your Needs
Your multi-tool choice depends on three factors: your bike's fastener sizes, mechanical skill level, and riding style.
Fastener Audit: Know Your Bike
Identify every fastener on your bike: brake lever bolts, derailleur hanger bolts, seat post clamp, stem bolts, and suspension bolts. Most modern mountain bikes use 4mm, 5mm, and 6mm hex keys. If you find 8mm bolts, 10mm sockets, or proprietary fasteners, choose the 17-in-1; the weight difference (0.3 oz) is negligible.
E-MTB riders should check their bike's manual for proprietary motor or battery fasteners that may require specialized tools.
Skill-Based Selection: Beginner vs. Advanced
Beginner riders should carry an 11-in-1 for basic adjustments and chain repair; practice at home first. Intermediate riders benefit from a 17-in-1 if they adjust derailleurs or suspension mid-ride. Advanced riders may supplement a 17-in-1 with dedicated suspension tools for specialized platforms.
Bike Type Considerations
Hardtail riders typically use an 11-in-1. Full-suspension riders should audit bolt sizes, rear shock mounts may require the 17-in-1. Gravity riders often carry 17-in-1 for field adjustments; cross-country racers prefer the lighter 11-in-1.
Tubeless Tire Repair Kit for Mountain Bikes: Essential Components
Tubeless tires are standard now and resist punctures better than tubes. Punctures under 6mm may self-seal, but larger holes require a plug kit, the most common trailside repair.
The Tubeless Tire Repair Tool at $24.99 includes a tire reamer and fork (25g total). The reamer roughens the hole for adhesion; the fork inserts the plug.

If you're running tubes, skip the tubeless kit entirely. If you're tubeless, this tool belongs in your kit, period. The cost is minimal compared to the frustration of a slow leak three miles from the car.
Storage and Portability: Carrying Your Gear Trailside
Where you carry your tools matters as much as what you carry. A tool does nothing if you can't access it quickly or if it gets lost mid-ride.
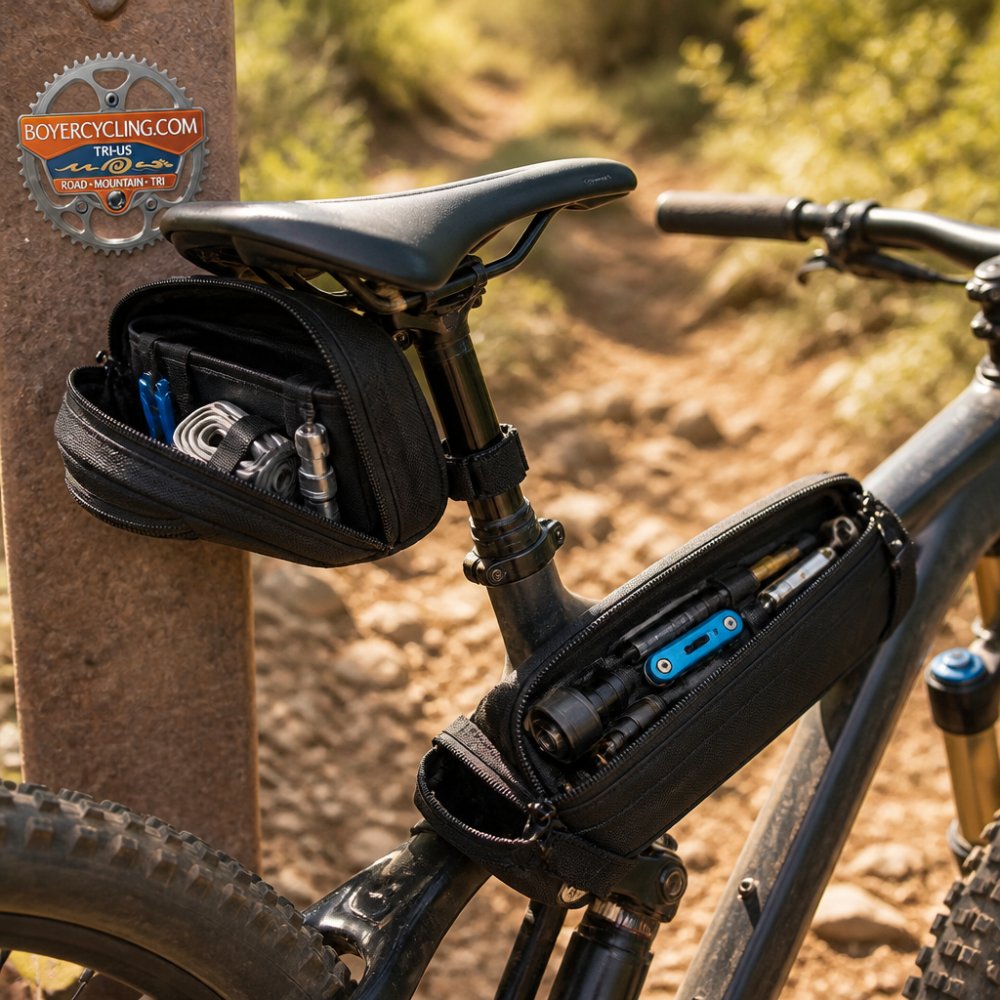
Seat bags are the standard choice for mountain bikers. They keep tools low and centered, they don't interfere with your riding position, and they're easy to remove for home storage. The Seat Bag, Welded, TPU, Black from Orange Mud weighs just 2.5 ounces and holds a multi-tool, spare tube, and tire levers without bouncing. At 39.95, the waterproof nylon keeps your tools dry in wet conditions.
For more gear, the Bike Frame Bag, Welded Seams, TPU Coated, Black holds 4.5 liters at 13.8 ounces and fits in your frame triangle.
The Handlebar Jack Tool Pack is purpose-built for riders using a repair stand. It weighs just 4 ounces, attaches under your saddle with hook-and-loop straps, and has compartments designed specifically for the Handlebar Jack and Saddle Jack. This setup is ideal if you're the type to do detailed adjustments at trailside rather than quick fixes.
Don't overthink storage. A seat bag handles 90% of mountain bike riding. If you're carrying more than a multi-tool, spare tube, and tire levers, you're overprepared for most situations.
Mountain Bike Tool Kit Checklist: What You Actually Need
Here's the honest checklist. Not the "everything you might need someday" list, the tools that actually solve problems on the trail.
Makalu 11 in 1 Bicycle Pocket Multi Tool folding bike repair tool →
| Tool | Purpose | Why It Matters | Alternatives |
|---|---|---|---|
| Multi-tool (11 or 17-in-1) | Fastener adjustments, chain repair | Handles 80% of mechanical issues | None, this is essential |
| Spare tube | Puncture repair (non-tubeless) | Faster than patching on trail | Tubeless sealant if running tubeless |
| Tire levers | Tire removal | Prevents rim damage, saves time | Spoon or coin (not ideal) |
| Tubeless plug kit | Puncture repair (tubeless) | Only option for large punctures | Sealant alone (unreliable) |
| CO2 cartridge + inflator | Tire inflation | Faster than hand pump | Hand pump (heavier, slower) |
| Chain quick-link | Chain repair | Faster than chain breaker alone | Chain breaker only (requires tools) |
The rest, extra tubes, patch kits, sealant, full repair stands, are nice to have depending on your ride distance and mechanical confidence. For a typical trail ride under two hours, the essentials above are enough.
Weight-conscious riders often ask: can I skip the spare tube if I'm running tubeless? Technically yes, but it's a gamble. A tubeless tire with a large puncture or a sidewall issue might not seal. A spare tube is insurance for under 2 ounces.
Common Mistakes When Building Your Trail Kit
Most riders make predictable mistakes when assembling their trail kits. Understanding these pitfalls helps you avoid wasting money on tools you'll never use or being stranded without the one thing you need.
Mistake 1: Overpacking for Hypothetical Scenarios
The most common error is building a kit for every possible mechanical failure instead of the ones you'll actually encounter. Riders often carry full repair stands, multiple spare tubes, patch kits, sealant bottles, and specialized tools for issues that happen once every five years.
A typical two-hour trail ride rarely produces more than a flat tire or a dropped chain. Yet many riders pack as if they're doing a multi-day expedition.
The fix: start with the essentials (multi-tool, one spare tube, tire levers, tubeless plug kit if applicable, CO2 cartridge). Ride for a month and track what you actually use. Only add tools that solve problems you've encountered. If you've never needed a derailleur adjustment tool in 50 rides, you don't need it in your kit.
For riders doing longer backcountry rides (4+ hours), a second spare tube and a patch kit make sense as backup. For local trail loops under two hours, they're redundant.
Mistake 2: Carrying Tools You Don't Know How to Use
This is subtle but critical. Many riders buy a 17-in-1 multi-tool because it sounds more capable, then never use half the tools because they don't understand what they do.
A chain breaker is useless if you don't know how your chain works or how to reinstall it. A derailleur adjustment tool does nothing if you've never adjusted a derailleur. A spoke wrench is wasted weight if you don't know how to true a wheel. Carrying these tools creates false confidence, you think you're prepared, but you're actually just carrying dead weight.
The fix: before you take any tool on the trail, use it at home. Remove your rear wheel and practice using your chain breaker. Adjust your derailleur limit screws in your garage. Spin your wheel and practice spoke tension adjustments. If you can't do it at home with no pressure and all your tools laid out, you won't be able to do it on the trail with cold hands and fading light.
Start with tools you're confident using: multi-tool hex keys, tire levers, and CO2 cartridge. Add specialized tools only after you've practiced them at home and encountered real problems that require them.
Mistake 3: Ignoring Compatibility
Tools that don't match your bike are worse than useless, they create frustration when you need them most.
Common compatibility failures:
- Valve type mismatch: Your spare tube has a Presta valve, but your tire uses a Schrader valve. The tube won't fit, and you're stranded with a flat.
- Hex key size mismatch: Your multi-tool has 2mm, 3mm, 4mm, 5mm, 6mm, and 8mm keys, but your brake lever bolts are 2.5mm. The closest size either strips the bolt or doesn't fit.
- Tire lever incompatibility: Your rim has a hookless bead, but your tire levers are designed for traditional rims. They slip and damage the rim.
- CO2 cartridge thread mismatch: Your inflator uses 16g cartridges, but you bought 25g cartridges. They don't thread together.
The fix: before your first ride with a new tool, test it on your bike at home. Install your spare tube to confirm the valve type matches. Use your tire levers on your actual rims to confirm they fit without slipping. Thread your CO2 cartridge into your inflator to confirm compatibility. Spend five minutes checking these details now instead of discovering the problem on the trail.
Mistake 4: Not Maintaining Your Tools
Tools left in a damp seat bag for weeks develop rust, corrosion, and mechanical failure. A multi-tool with seized hinges or a CO2 inflator with a stuck valve is useless when you need it.
The fix: after every wet ride, remove your tools from your seat bag and let them air dry. Once a month, wipe down your multi-tool with a dry cloth and check that all hinges move freely. Test your CO2 inflator by dry-firing it (without a cartridge) to confirm the valve mechanism works. Store your tools in a dry location, not in a damp garage or car trunk.
If you ride in consistently wet or muddy conditions, consider tools with corrosion-resistant coatings.
Frequently Asked Questions
What tools should I carry on a mountain bike ride?
Start with a multi-tool containing hex keys, screwdrivers, and a chain breaker. Add a tubeless tire repair kit if you run tubeless tires, spare tube or patches, tire levers, and a compact pump or CO2 cartridges. For longer rides, include a derailleur hanger tool and spoke wrench. Store everything in a seat bag or frame bag to minimize weight while keeping tools accessible for trailside repair.
What is the most essential tool for mountain biking?
A multi-tool with hex keys is your foundation. Most mechanical failures on the trail involve loose bolts, derailleur adjustments, or brake pad issues, all fixable with the right Allen keys and screwdrivers. The Makalu 11 in 1 or 17 in 1 multi-tools cover these basics and fit in a pocket or seat bag, making them the single most important item to carry.
What should be in a mountain bike repair kit?
A complete mountain bike repair kit includes a multi-tool, spare tube or tubeless plugs, tire levers, chain tool, pump or CO2 inflator, and a saddle bag or frame bag for storage. For technical trails, add a derailleur hanger tool and valve core tool. Weight matters on the trail, so prioritize tools that handle the most common failures: flats, chain breaks, and loose fasteners.
What tools do I need for tubeless mountain bike tires?
A dedicated tubeless tire repair kit is essential. It includes a tire reamer to roughen the puncture area and a tire fork to insert sealant-coated plugs. The Tubeless Tire Repair Tool at BoyerCycling weighs just 25 grams and comes in multiple colors. Pair it with a small sealant bottle, spare plugs, and a compact pump to seal and reinflate your tire on the trail.